
How to Wear a Lace Front Wig and Get an Invisible Melt
How to wear a lace front wig properly is the ultimate secret to getting a completely flat, realistic hairline. Unlike traditional caps that can look thick and obvious along the forehead, a lace front mimics how your natural strands grow. If you want a seamless blend without worrying about the unit shifting, follow this straightforward guide from Royal Hair to secure your look.
How does a lace front wig differ from a traditional wig?
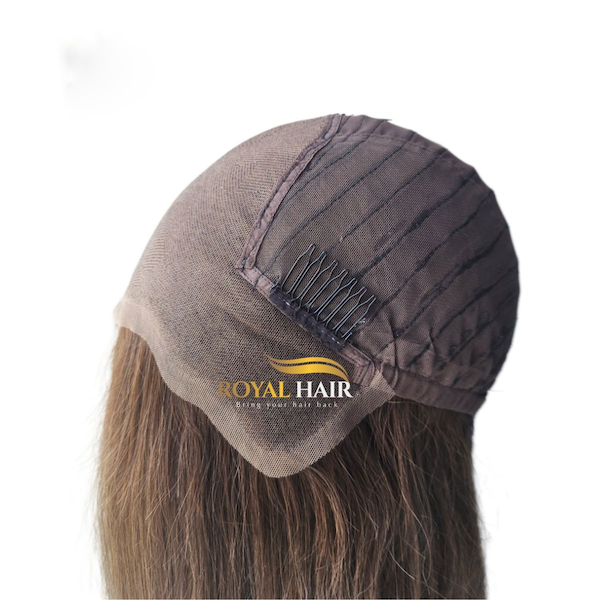
Regular wigs feature a thick, pre-made border at the front that requires bangs or careful styling to hide the edge. A lace front wig, however, uses a sheer panel of mesh along the hairline where human hair is hand-tied strand by strand. This sheer lace melts directly into your skin, creating the illusion of hair growing straight from your scalp and allowing you to part your hair any way you like.
What tools and products do you need to install a lace front wig?
Gather your tools beforehand so you aren’t scrambling while your glue is drying:
- A flesh-toned wig cap (to flatten your natural hair).
- Rubbing alcohol and cotton pads (to clean your hairline).
- Wig adhesive, lace tape, or a strong-hold styling gel.
- A small scissors or a sharp razor (to trim the excess lace).
- A fine-tooth comb or an elastic melting band.
How To Put On A Lace Front Wig
Securing your unit requires patience and a proper foundation. If you want a flawless, celebrity-level melt that keeps your natural hair healthy, follow this professional 10-step method using the bald cap technique:
Step 1: Protect and mold your natural hair
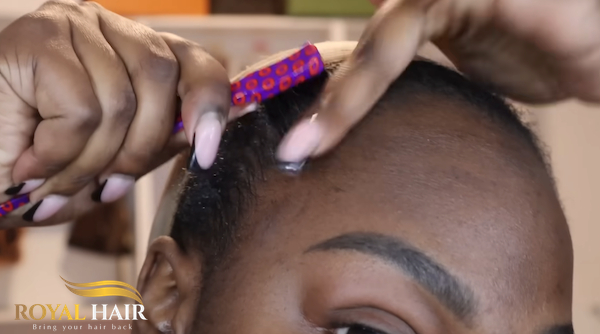
Separate your natural hair into two even sections, plait them down to the ends, and secure them with small elastics. Wrap and pin the plaits tightly around your head so your hair sits as flat as possible. Apply a generous amount of Got2b gel along your natural hairline and baby hairs, then brush everything straight back. This moves your edges completely out of the way, protecting them from friction and hair loss caused by the adhesive later.
Step 2: Dry the base
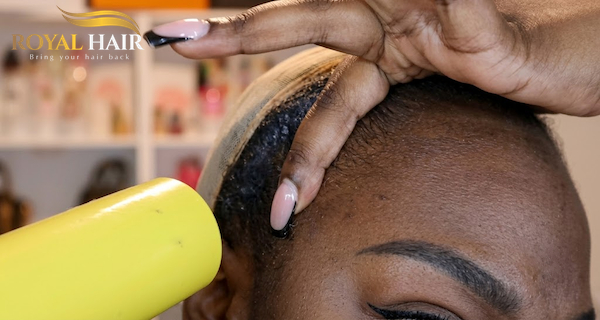
Take your blow dryer on medium warm heat to mold the hair and dry the gel completely in place. Keep in mind that this is the only step where you will use warm heat; switch to cool air from here on out.
Step 3: Apply an HD wig cap
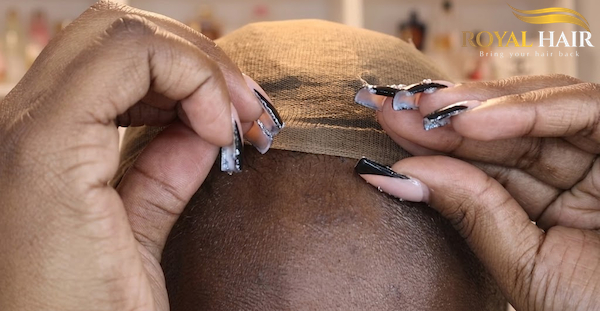
Pull a high-definition wig cap over your head, stretching it carefully from the nape of your neck to the top of your forehead. Choosing a shade like dark brown that matches or sits slightly darker than your skin tone helps it melt instantly. Push as much of the cap to the front as possible to cover your full hairline.
Step 4: Cut the ear tabs
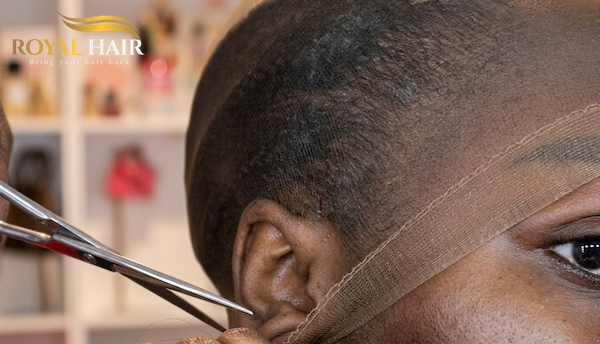
Make a very small snip right behind your ear on the cap, then gently stretch that tiny opening over your ear. Because HD caps are incredibly thin and stretchy, a minimal cut is all you need to release the pressure without ripping the fabric.
Step 5: Apply cream foundation
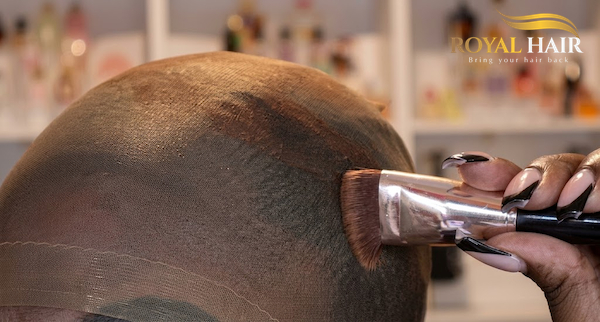
Blend a low-oil cream foundation (like Ruby Kisses) all over the cap using a makeup brush. Opt for a slightly darker shade rather than a lighter one so the cap doesn’t flash white through the lace and avoids looking caked up.
Step 6: Spray the cap adhesive
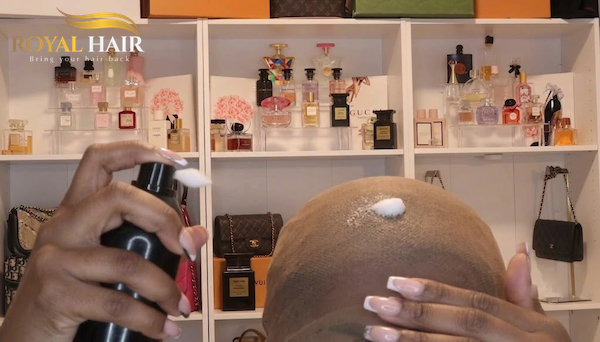
Use a high-quality adhesive spray (such as Eben Black Bottle or Got2b spray) and apply a light layer right in front of your hairline. Do not spray too far forward onto your forehead skin or too far back into your hair. Tap the wet spray gently with your fingers to help it melt directly into the skin, then dry it completely with cool air.
Step 7: Prep the wig’s lace
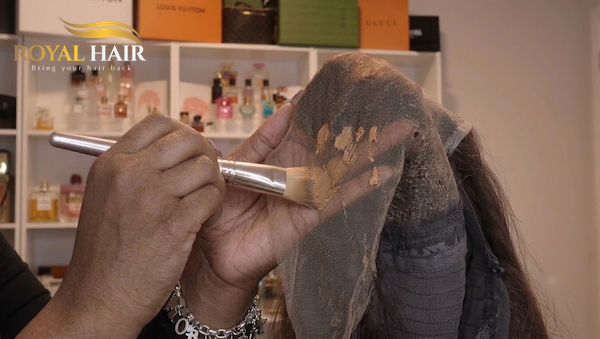
Take the wig out of its box and protective net. Take the exact same foundation shade used on your cap and dab it all over the inside lace of your wig so everything matches seamlessly. Mist the lace with a light coat of Got2b spray to lock the makeup in place, which prevents a cakey install.
Step 8: Cut away the excess cap
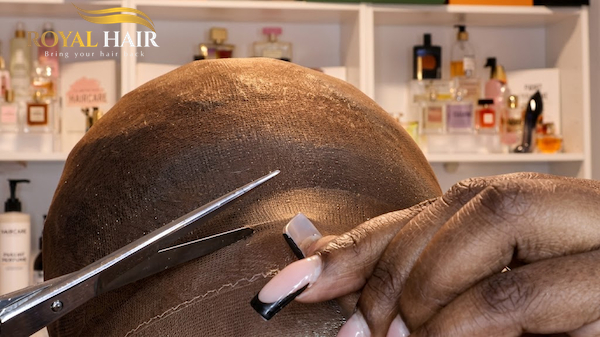
Use a sharp pair of scissors to cut away the exposed front mesh of the wig cap. Do not cut straight through from front to back; slice carefully right along the line where the adhesive spray was placed. Leaving the rest of the cap intact secures the back of your head without exposing your natural braids. Trim off any remaining lifting or white pieces of the excess cap.
Step 9: Position and align the wig
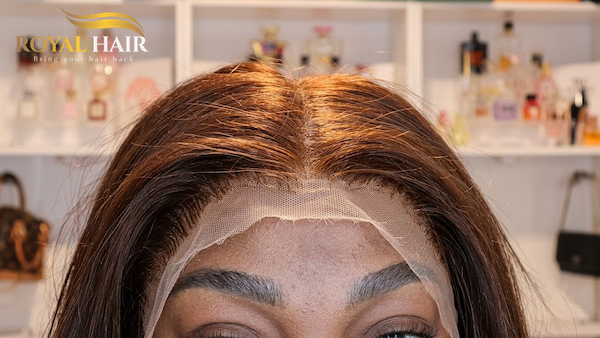
Before placing the unit on your head, crisscross the adjustable straps inside the back of the wig cap to tighten the perimeter. Use a hot comb to press and style all the wig hair straight back out of the way. Position the wig on your head, pushing the built-in hair combs through the wig cap for added security, and line the lace hairline up precisely over your natural hairline.
Step 10: Clean your skin
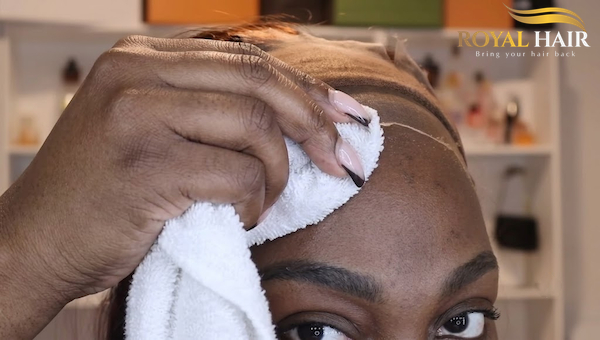
Lift the front edge of the lace slightly and clean your forehead skin with an alcohol wipe. This removes any leftover oils or dirt that could cause your wig to lift prematurely.
Step 11: Apply the skin adhesive
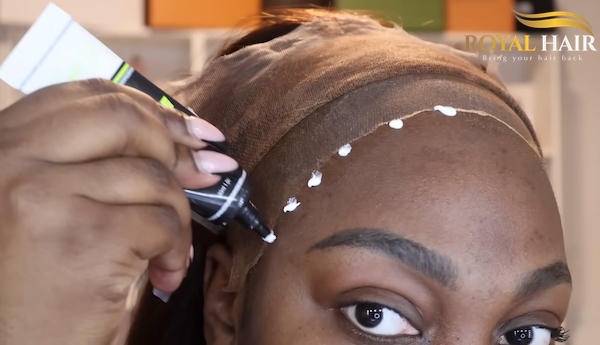
Apply your choice of adhesive (like Hold Me Down glue) in small polka dots along the hairline, spreading it into a thin, perfectly flat layer using a wooden stick. Apply 3 to 4 thin layers maximum to avoid product buildup, letting each layer air dry clear and tacky (about 10–30 seconds) before applying the next.
Step 12: Stretch and press the lace
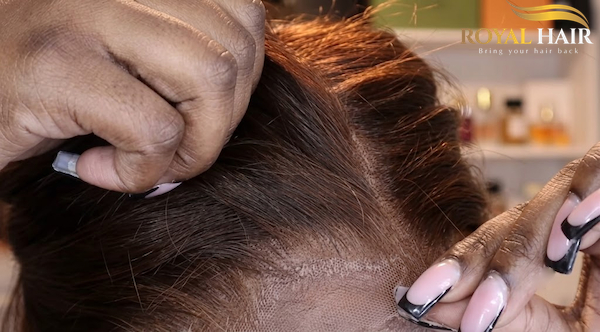
Start at the front center to lock your middle part in place. When doing the sides, stretch the lace as close as you can toward your ears to prevent ruffling at the edges. Use the tail of a fine-tooth comb to comb through the front hairs while pressing the lace firmly into the clear glue to ensure a seamless bond.
Step 13: Trim the excess lace
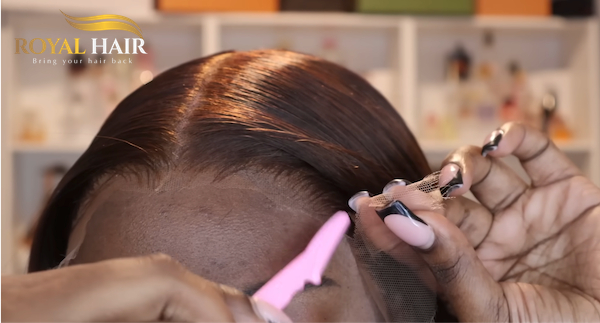
Cut the lace into manageable front and side sections first. Use a sharp pair of scissors in a small zig-zag motion, or use a mini razor with a rigid edge to slice away the excess mesh. Avoiding straight cuts ensures the edge mimics a natural, jagged hairline. If any small section close to the ear lifts, secure it with a tiny dab of clear eyelash glue.
Step 14: Melt, style, and touch up
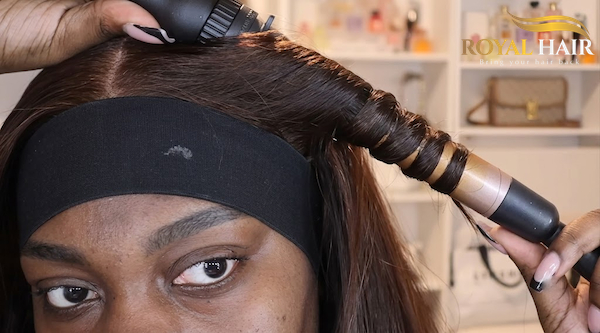
Pull the shorter baby hairs forward for extra authenticity. Tie an elastic melting band or scarf tightly around your hairline for 5 to 10 minutes to lock the fusion. While melting, apply a wax stick and hot comb the hair section-by-section in a “back and down” direction to make the top completely flat. Remove the band, touch up any ashy spots on the lace with your cream foundation, and style your hair with a wide-tooth comb or curling wand to finish your look.
Additional pro tips for achieving a flawless wig look
- Use a melting band: Once your wig is secured with gel or glue, tie a tight elastic band around your hairline for 10 minutes to melt the lace deep into the skin.
- Match your skin tone: Use a makeup brush to dab a tiny bit of your regular face powder onto the lace parting space to hide the grid marks.
- Wash the lace gently: Makeup and glue buildup will ruin the transparency of the lace. Clean the inside mesh regularly to keep the melt looking flawless.
Frequently Asked Questions
Is glue absolutely necessary for a lace front wig installation?
No. You can easily use a silicone grip band, double-sided lace tape, or simply rely on the adjustable straps and combs inside the cap for a glueless, daily wear option.
What is the maximum duration for wearing a glued lace front wig safely?
A high-quality waterproof wig adhesive can hold for 1 to 3 weeks. However, leaving it on longer than that can trap sweat and bacteria, leading to breakouts or skin irritation.
Can a lace front wig withstand intense workouts and swimming?
Yes, but only if you secure it with a fully waterproof, sweat-resistant adhesive. If you are just using styling gel or a glueless band, it will slide right off under water or heavy sweat.
How to wear a lace front wig like a professional comes down to flattening your natural base and prepping your skin correctly. Treat the lace gently, avoid rushing the adhesive steps, and your unit from Royal Hair will keep looking completely undetectable.
